Video Splitter

 Guide Tips

  • Part 1. How to Register ApowerShare Video Splitter
  • Part 2. How to Split a Large Video File into Several Segments Lossless
  • Part 3. How to Make Start Time and End Time
  • Part 4. How to Take HD Screenshot

Part 1. How to Register ApowerShare Video Splitter


ApowerShare Video Splitter only offers a free trial for users to cut two videos files. After the free trial expires(15 days), if you want to continue using the software to split your video files, you need to register the software to unlock all features. So how to purchase and activate the registered ApowerShare Video Splitter? Here's the guide you need to follow.

STEP 1. Purchase License for ApowerShare Video Splitter

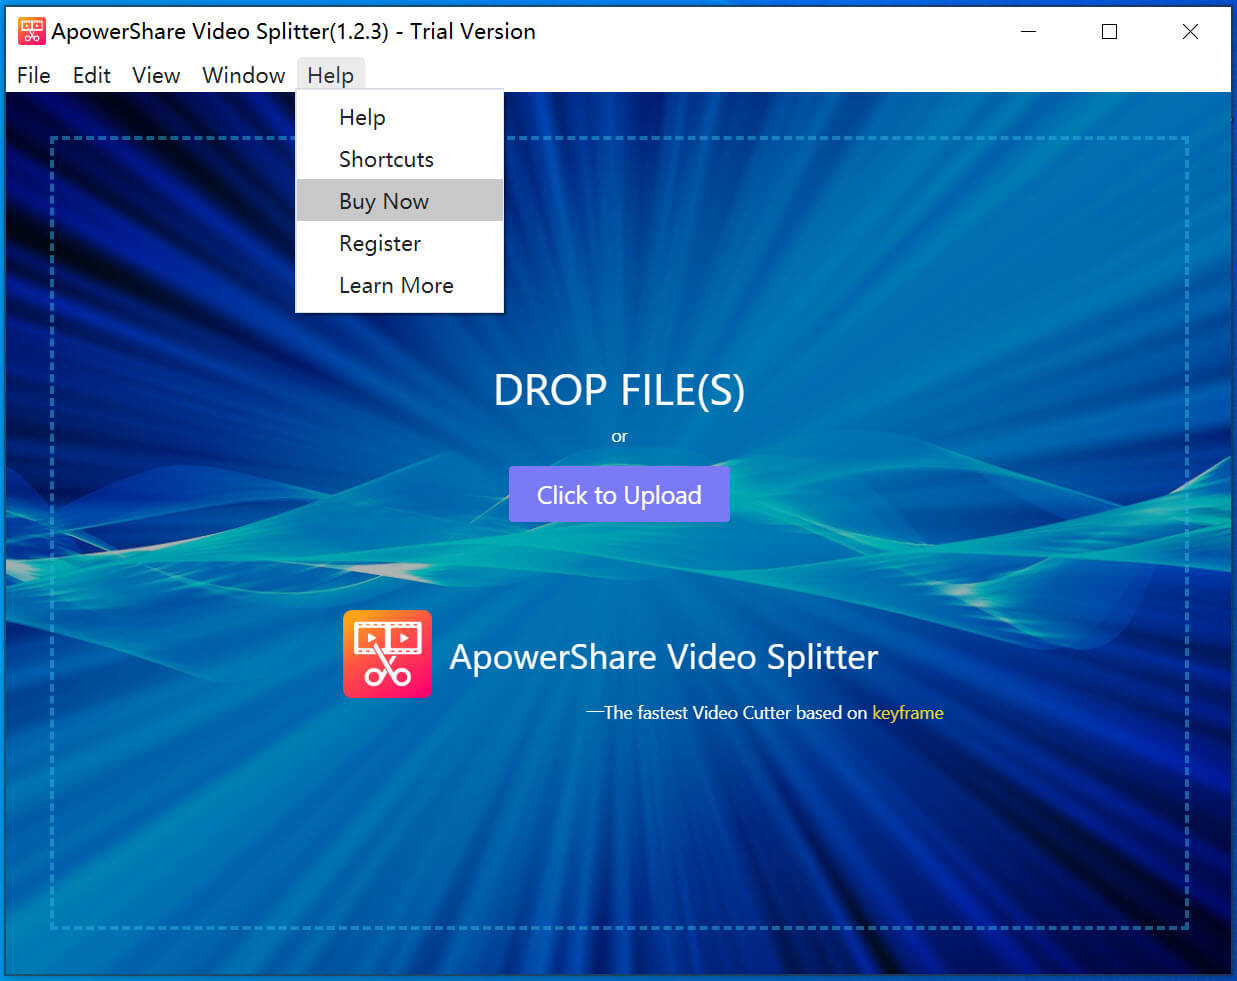
When you launch ApowerShare Video Splitter under a free trial, if you want to unlock all features, please hit "Buy Now" to get a license if you don't have one.

STEP 2. Receive License Key in Email

During the purchase, you are required to enter your email address to receive the license key. Once the purchase completes, open your mail box and check whether you have received it.

STEP 3. Activate ApowerShare Video Splitter

When you successfully receive the license key, simply navigate back to ApowerShare Video Splitter and hit to “Help” option on the top right, then click "Register " on the status window.

Now copy and paste your license code, then clicking “Register” button, the software will be registered successfully.

Part 2. How to Split a Large Video File into Several Segments Lossless


Once you have installed ApowerShare Video Splitter and consider getting started to split a long video into several clips, follow the guide below to split large video into parts lossless at ease. With ApowerShare Video Splitter, you can easily split/cut any video file by time or the selection as needed.

STEP 1. Launch ApowerShare Video Splitter

Launch the ApowerShare Video Splitter on PC, you can see below main interface.

STEP 2. Add Video Files

Then, please clicking “Add File” button to add a video files into the software, you also can drag videos directly to add them into the software.

STEP 3. Split Your Video

Click on where you want to split your video or move the slider across the timeline. Then, please mark the target location. Delete the clips you don’t want, and then click “Export” button to continue next step.

Tips: ApowerShare Video Splitter also can split/cut video file by time or the selection as needed. ApowerShare Video Splitter is the most efficient and fastest video splitter tool in the market.

STEP 4. Select A Split Mode

ApowerShare Video Splitter can split any video and audio files, including AVI, MPEG, VOB, MP4, 3GP, RM, ASF/WMV/WMA, MKV MP3 and FLV, the software offers "Keyframe Mode" and "Normal Mode" to split video files.

Keyframe Mode: This splitting mode supports to split video files to source file format without re-encoding, which is very fast, split speed 10X faster than the Encode Mode.

Normal Mode(Encode Mode): This splitting mode can split a large video file into smaller equal files or custom duration videos. So, you can select per frame to precisely choose the starting/end point.

STEP 5. Start Splitting Video

Just hitting the "Export" button in the lower right corner start to split video or split into several equal-size clips.

Part 3. How to Make Start Time and End Time


Click on where you want to split your video or move the slider across the timeline, and then make where the target.

Delete the clips you don’t want.

Part 4. How to Take HD Screenshot


ApowerShare Video Splitter also offer screenshot features, you can easily to take a screenshot during playing a video with the built-in video player.

Easily to take HD screenshot with ApowerShare Video Splitter.