How to Record High-Quality Audio from Apps on Mac?


Best Way to Record high-quality Audio from Mac

ApowerShare Audio Recorder is a powerful app's audio recording tool that record any high-quality audio/sound from application/browser, including online meetings, gameplay sounds, living audio, live radio, it can easily record audio to MP3, WAV, and other formats. With built-in audio editor, you can edit the recorded audio files easily.

You can use it to record audio from live streaming platform, video/music platform, video meeting app, media player, social network, social apps (WhatsApp, Facebook, WEchat, Twitter, Skype, Telegram, Line, Discord, Kakaotalk, etc.), as well as recording audio from other popular apps, games and more.

Features of ApowerShare Audio Recorder

  • Record audio from application or browser easily.
  • Record audio from videos on popular video and game sites.
  • Record audio to MP3, AAC, FLAC, M4A, and WAV.
  • Record audio while online meetings
  • Record audio while playing games
  • Record audio from any social apps.

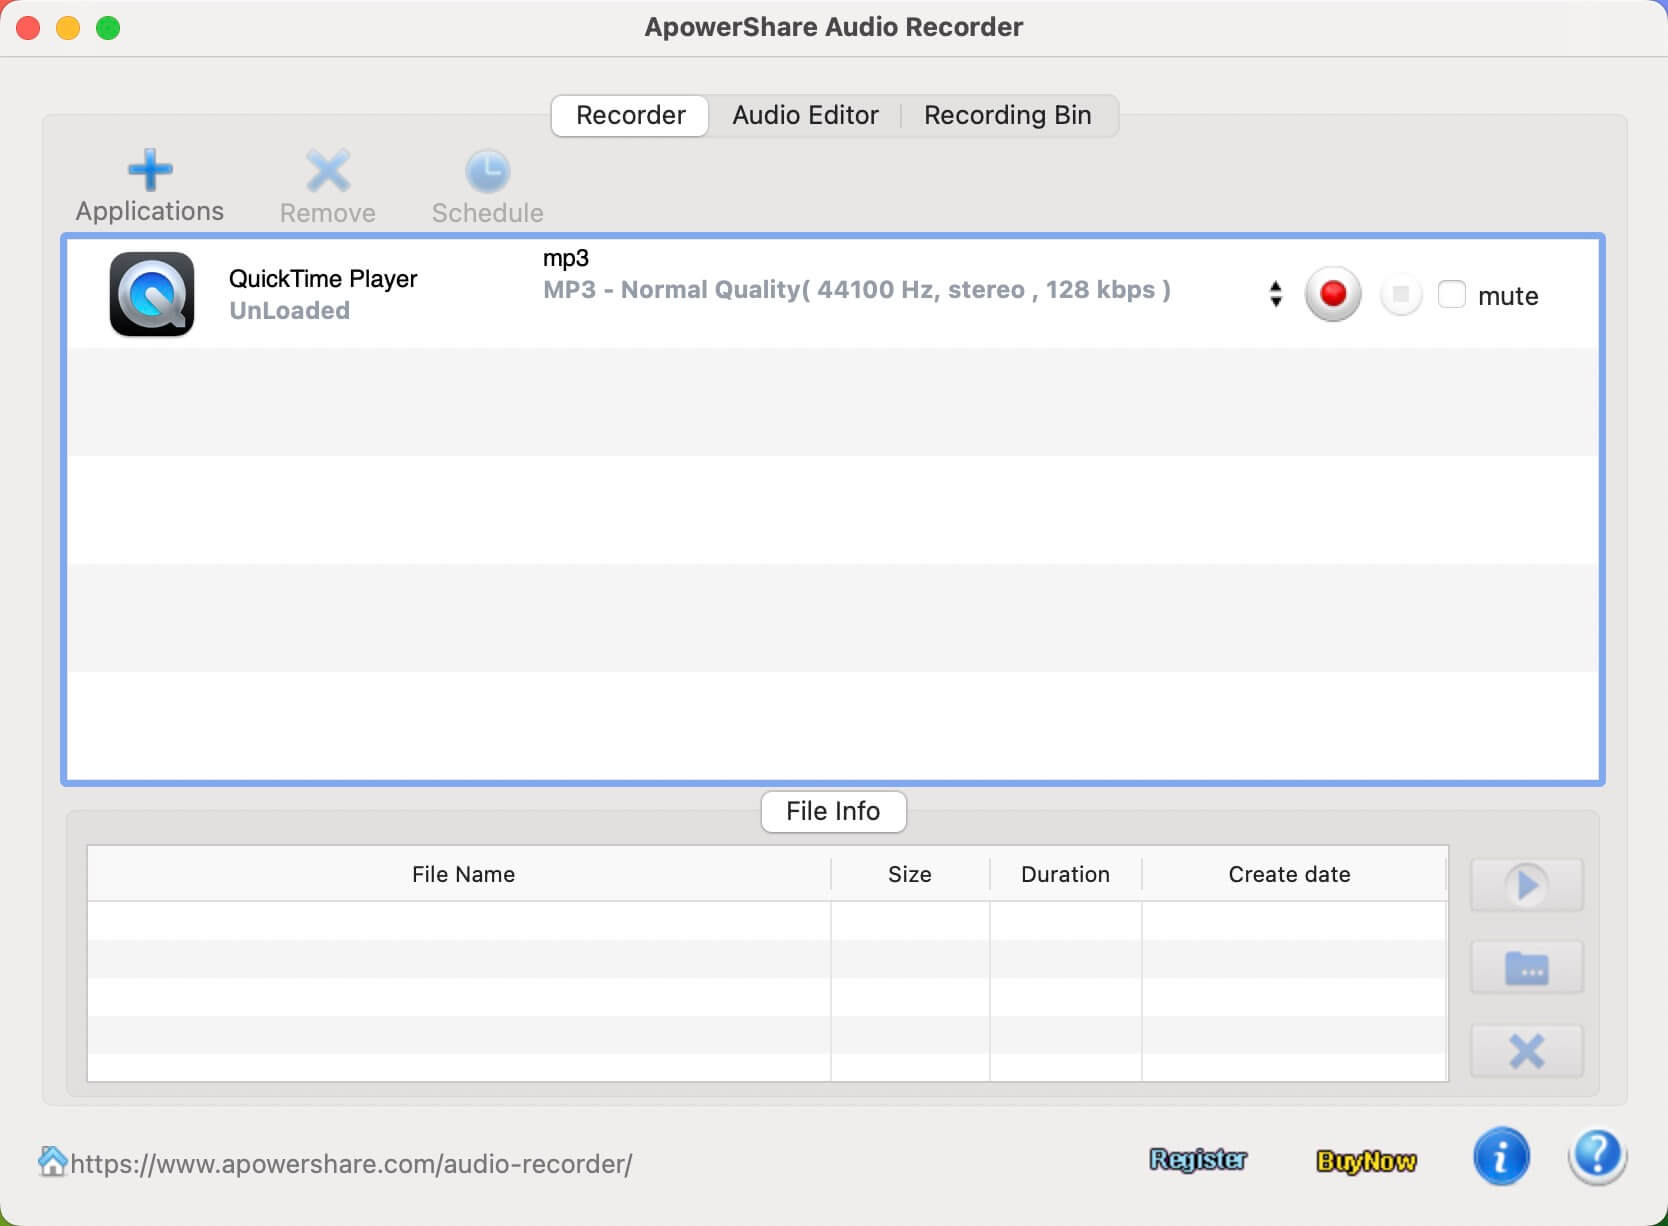
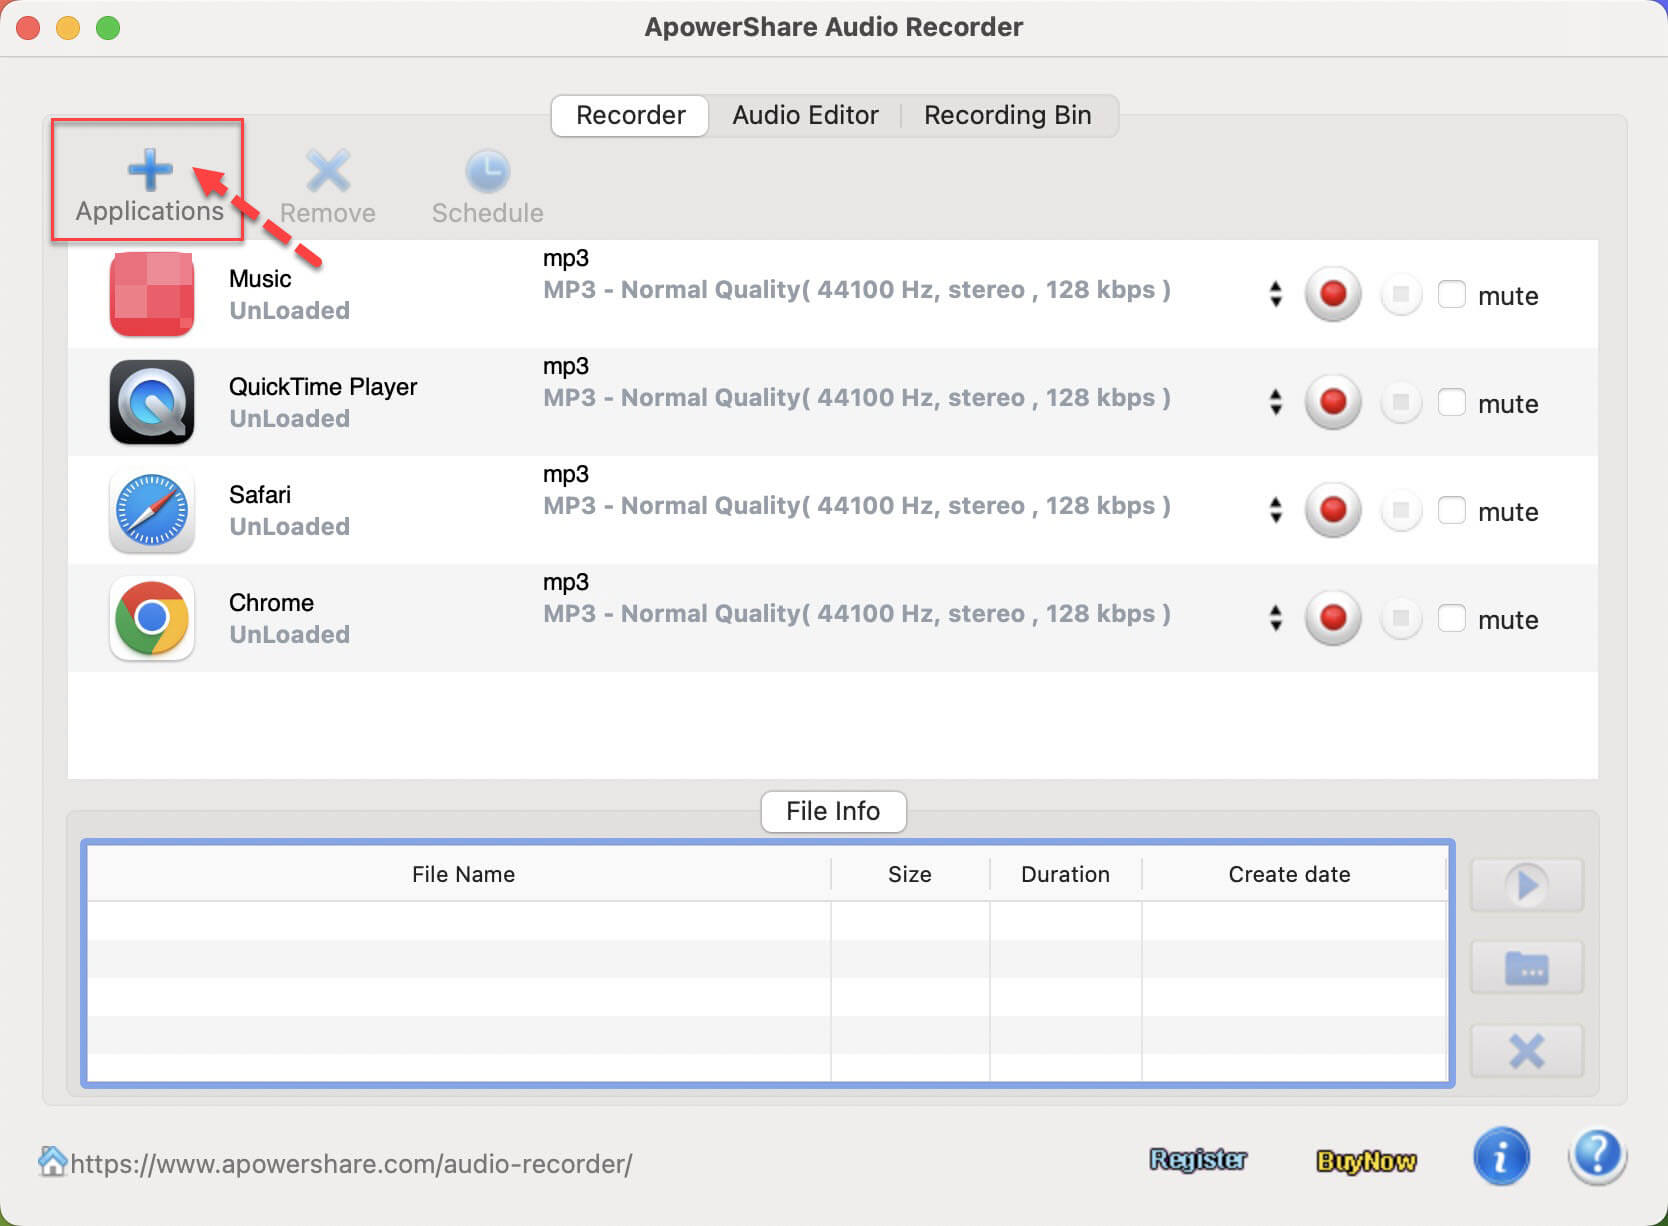
STEP 1. Add Application to the Program for Recording

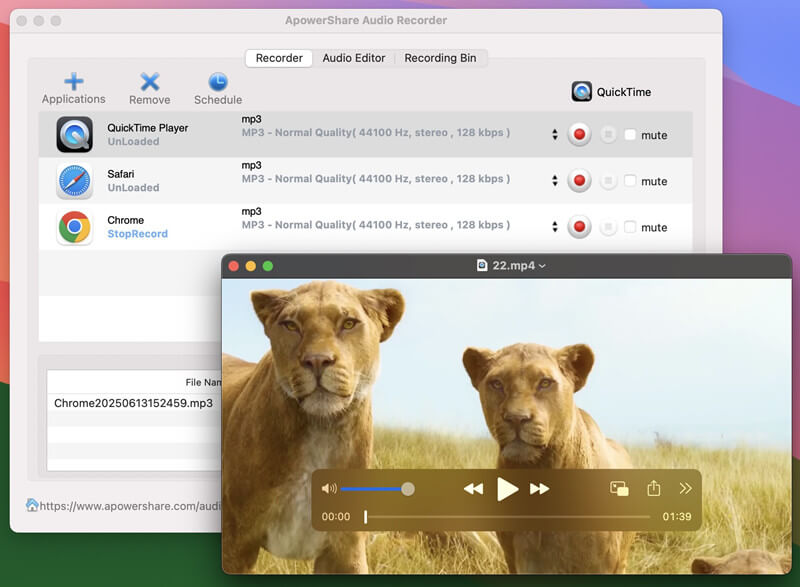
Launch the ApowerShare Audio Recorder on Mac, and then clicking “Application” button to add any app that you want to record audio from, such as Safari, Firefox, Chrome; or media player app such as QuickTime, iTunes, VLC.

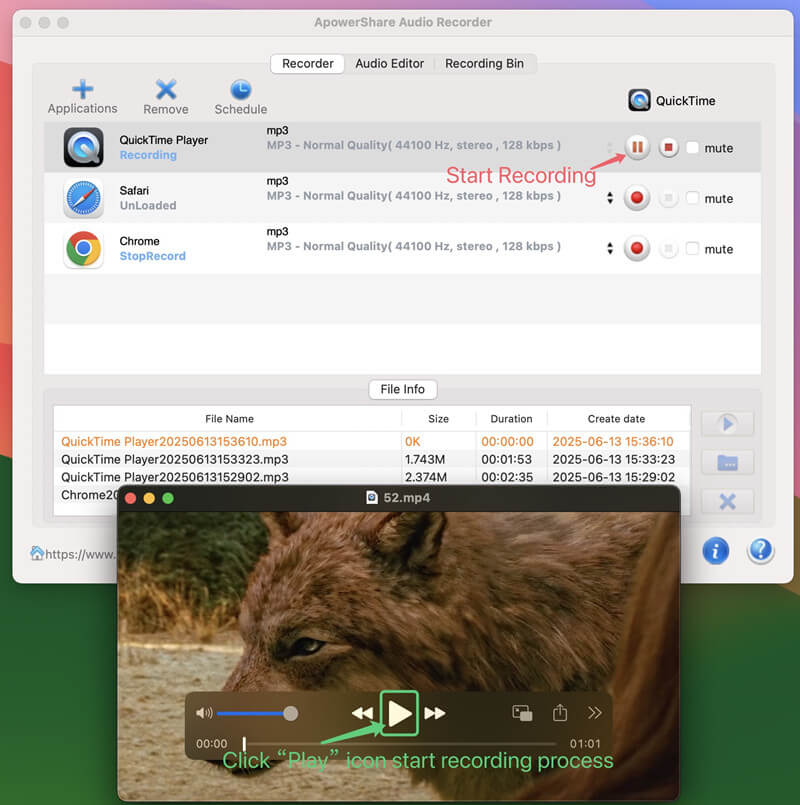
STEP 2. Play Video/Audio and Start Recording

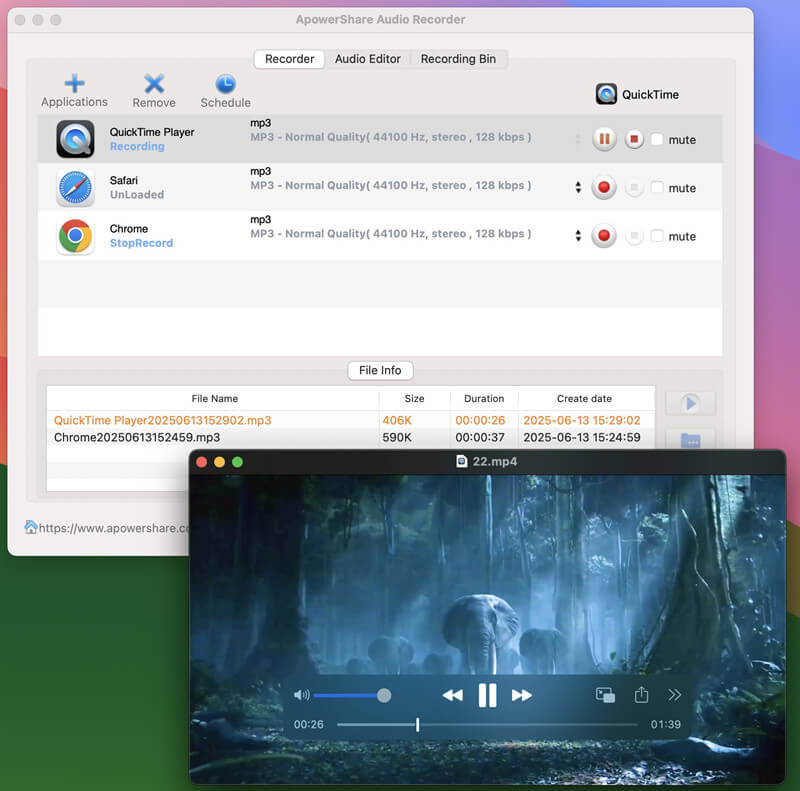
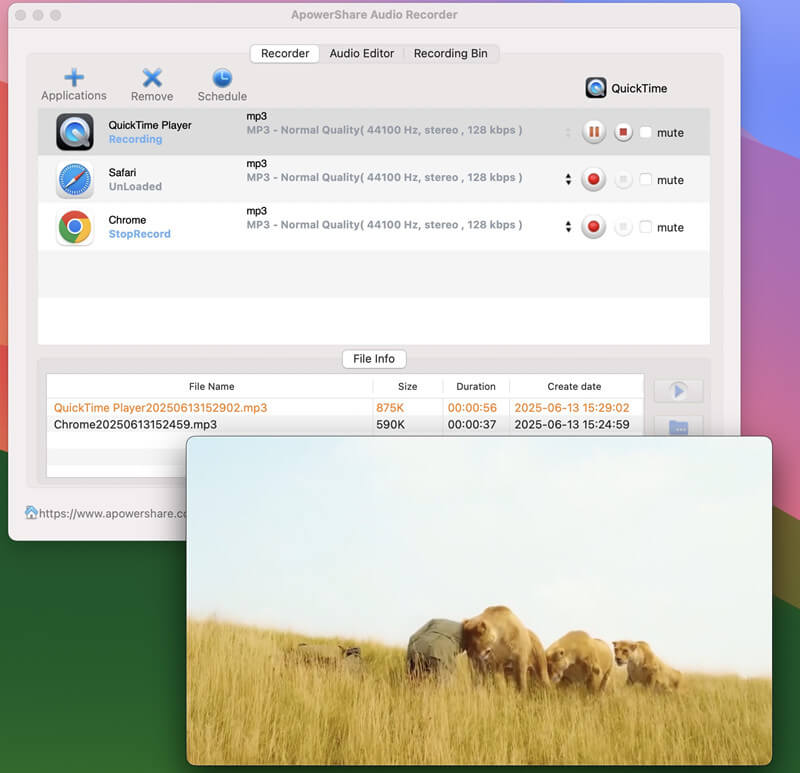
Please open the app that you want to record from, then go back to the Audio Recorder and click the left “Record” icon, just clicking “Play” icon on the application start to play a video, the Audio Recorder will detect this action and start to record audio automatically.

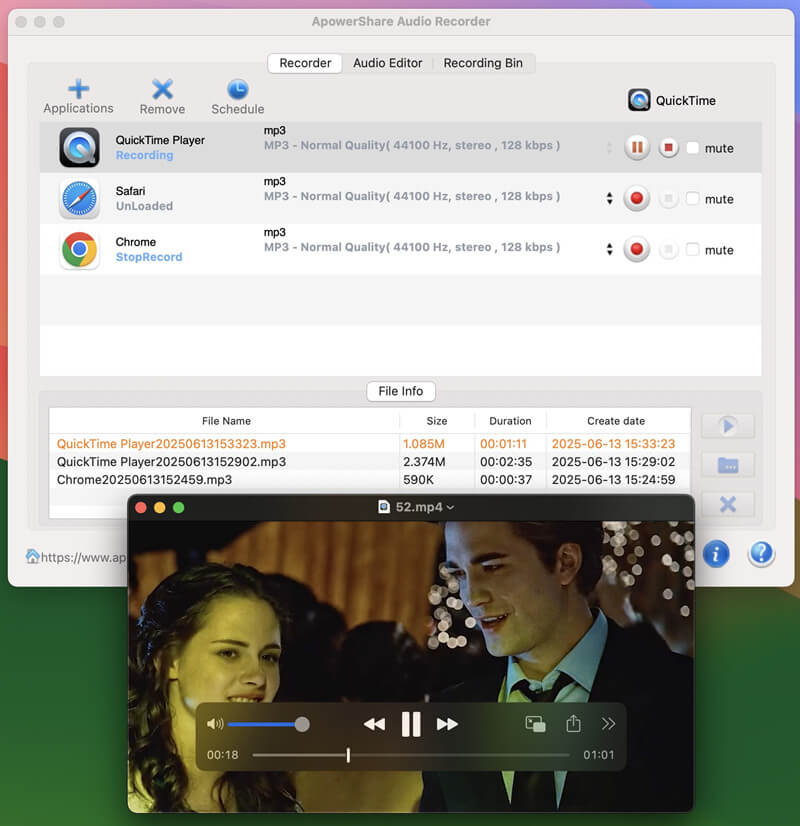
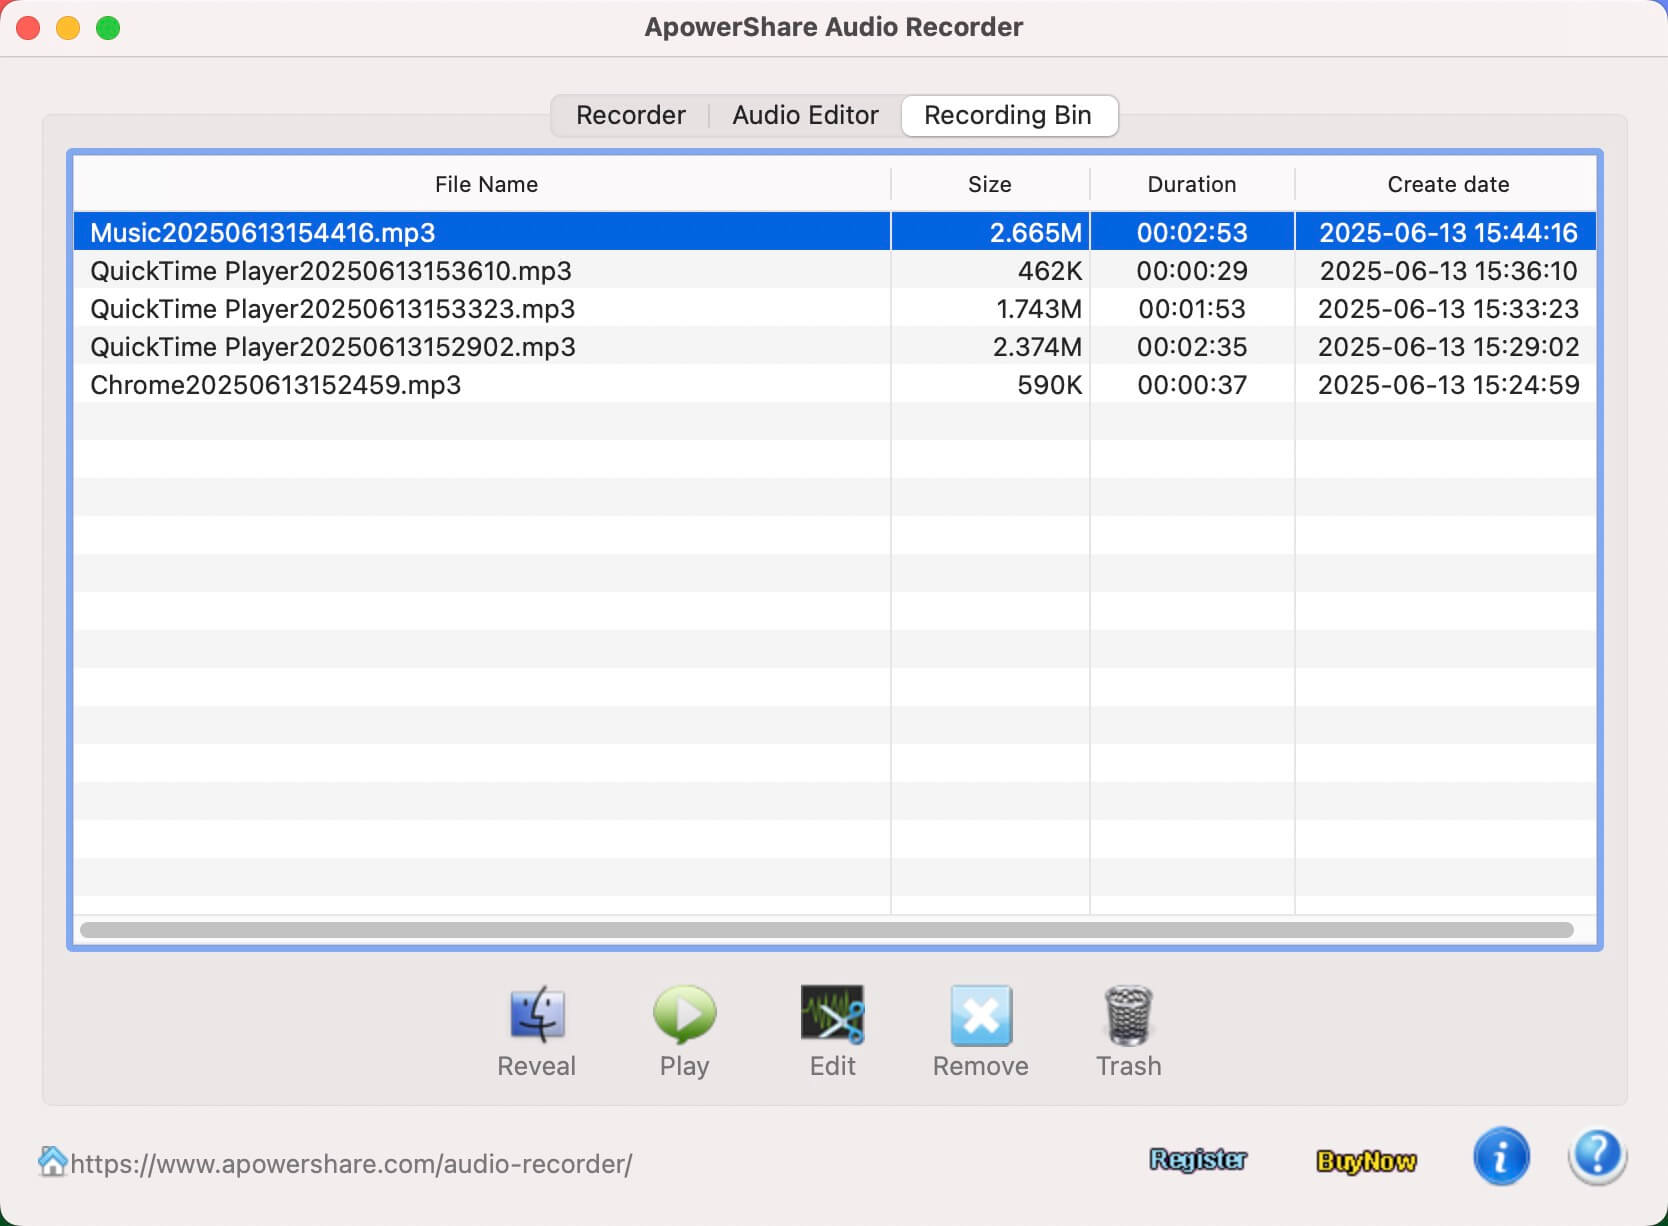
STEP 3. Stop or End Audio Recording

During audio recording process, you can click the left “Stop” icon to stop recording process, or clicking the right “End” icon to end the whole recording process, you will get local MP3 audio files.

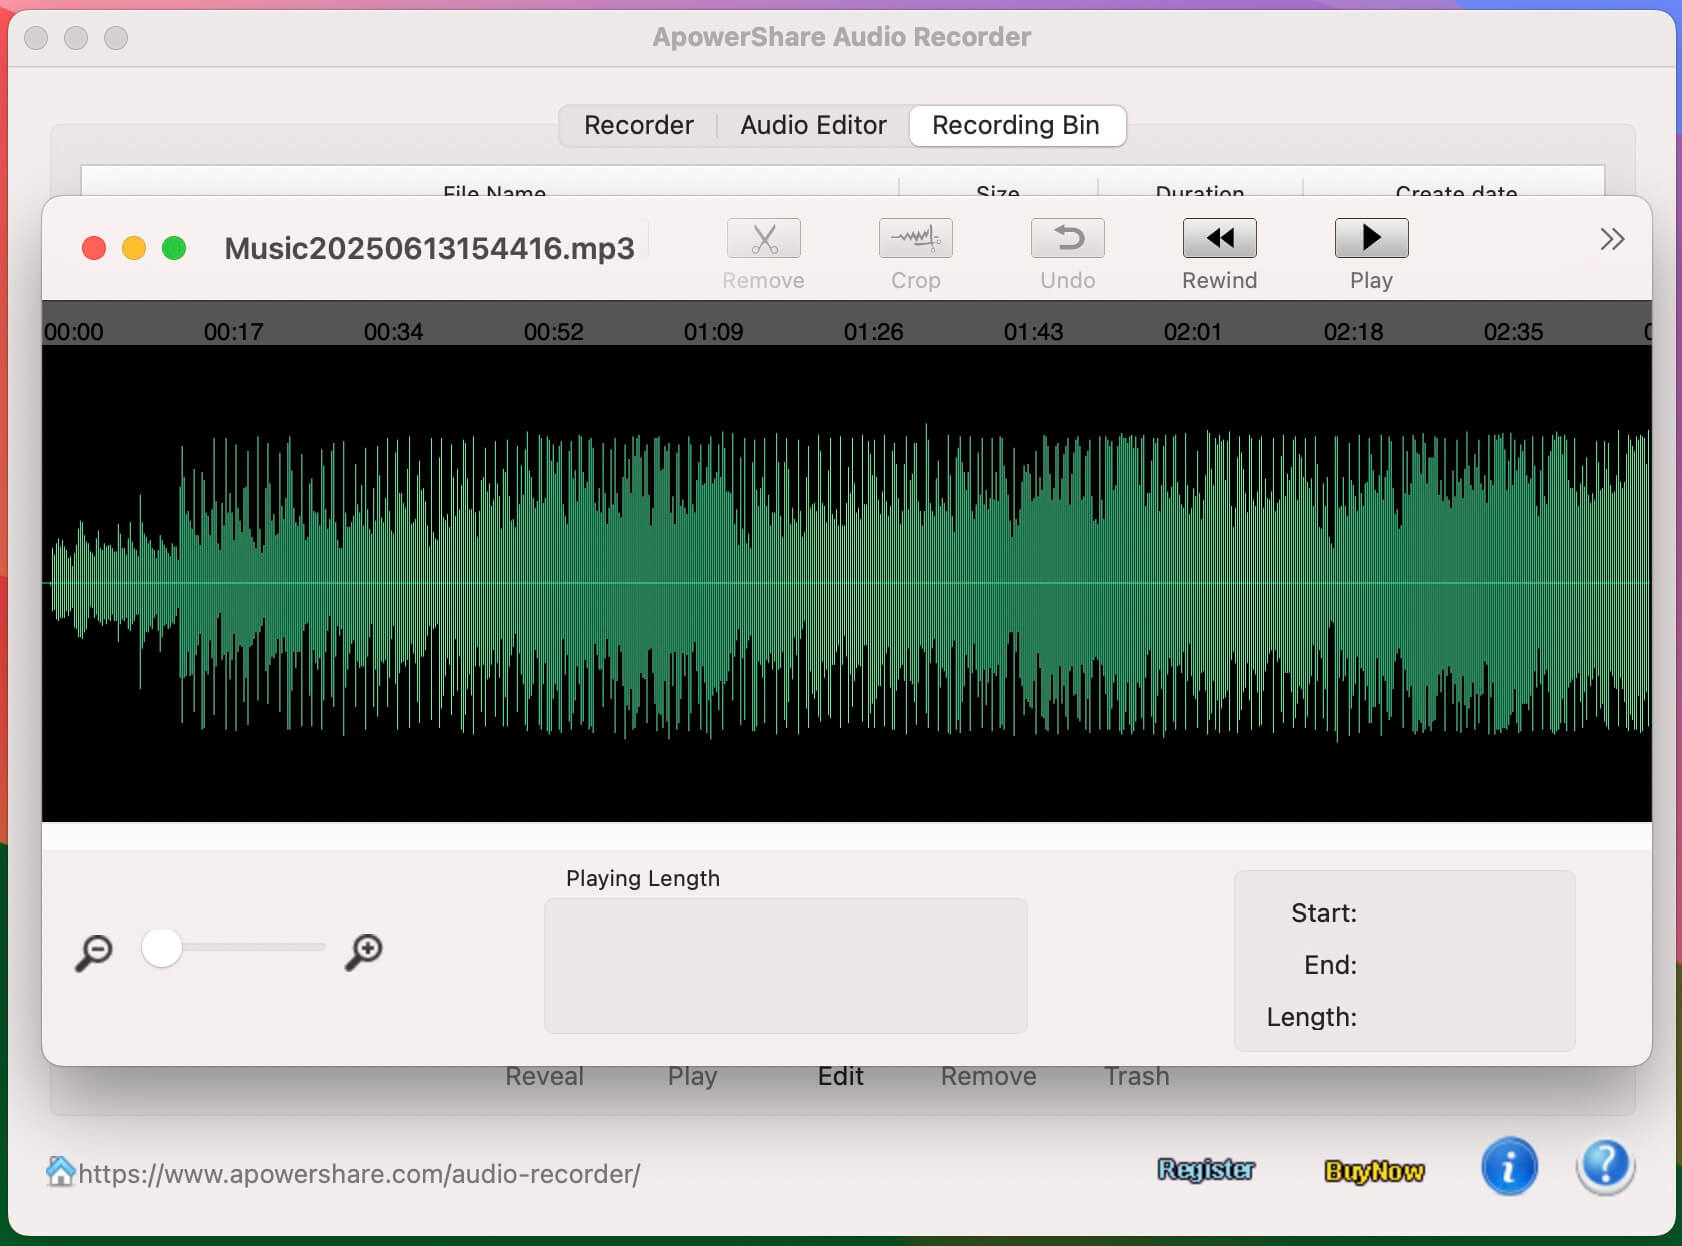
Tips: The software offer a built-in Audio Editor, you can easily to edit them.

Part 2. How to Record Audio from Application on Mac


Once you have installed ApowerShare Audio Recorder and consider getting started to record audio from any application on Mac (QuickTime, iTunes, Safari, Firefox, Chrome, Skype, iChat, Music Player, and other application, follow the guide below to process the simple audio/music recording without hassle!

STEP 1. Launch ApowerShare Audio Recorder

Launch the ApowerShare Audio Recorder on Macbook/iMac, you can see below main interface.

STEP 2. Add Application to Record Audio From

Then, please clicking “Application” button to add any app that you want to record audio from, you can add browser such as Safari, Firefox, Chrome; or media player app such as QuickTime, iTunes, VLC; or streaming music app, such as Apple Music, Spotify, YouTube Music, Amazon Music, Pandora Music, Deezer, Napster, Tidal, etc; or chat app such as Skype, iChat, FaceTime, Wechat, QQ, etc.

STEP 3. Play Video/Audio in App/Browser and Start Recording

Please open the app that you want to record from. Here, let’s take recording audio from QuickTime as example. Please open a video in QuickTime, then go back to the Audio Recorder and click the left “Record” icon, just clicking “Play” icon on QuickTime Player start to play a video, the Audio Recorder will detect this action and start to record audio automatically from QuickTime.

STEP 4. Stop or End Audio Recording

Duding recording process, you can click the left “Stop” icon to stop recording process, or clicking the right “End” icon to end the whole recording process.

STEP 5. View Audio Recording History

To view all recording history, please click “Recording Bin” menu, you can play them directly with it’s built-in media player. To get the recorded MP3 files, please click “Reveal” button to open the output folder, you will get the MP3 audio files.

Tips: There is a built-in Audio Editor in the software, please clicking “Edit” icon to launch the editing interface.

Part 3. How to Edit the Recorded Audio Files


ApowerShare Audio Recorder also provide a powerful Audio Editor, you can use the audio editing functions to cut and splice audio clips on your Mac in to your own unique track.

STEP 1. Launch Audio Editor

To launch it’s built-in audio editor, please open recording bin interface to view all of your audio recorded history. Please select a recorded audio that you want to edit, then click “Edit” icon to launch the Audio Editor.

STEP 2. Start to Edit Audio

With it’s built-in Audio Editor, you can easily to cut down your recordings by setting the start and end points. You also can cut and splice audio clips in to your own unique track.

Part 4. Record Audio from Other Application (Screenshot)


ApowerShare Audio Recorder support to record any audio from any application on your Mac, it’s very easy to use. With this Mac audio recorder, you can record audio from Chrome, Safari, Firefox, and other browser, so you can play music or video online via browser, then use our software to grab audio clips from your favorite videos on sites such as YouTube and Vimeo on Mac.

Record audio from Chrome

Record audio while playing a video

Record audio from QuickTime while playing a video

Record audio while playing a video on Mac

Record and extract audio from video